Modifying the Image (Post-processing)
Motivation
Post-processors allow custom modifications of the fetched image. In most cases image processing should already be done by the server before the image is sent down to the client, as the mobile device’s resources are usually more limited. However, there are many instances where client side processing is a valid option. For instance, if the images are being served by a third party which you do not control or if the images are local (on the device).
Background
In Fresco’s pipeline, post-processors are applied at the very end when the image already has been decoded as a bitmap and the original version is stored in the in-memory Bitmap cache. While the post-processor can directly work on the provided Bitmap, it can also create a new Bitmap with a different dimension.
Ideally, the implemented post-processor should provide a cache key for given parameters. By doing this, the newly generated bitmap is also cached in the in-memory Bitmap cache and don’t need to be re-created.
All post-processors are executed using background executors. However, naive iteration or complex computations can still take a long time and should be avoided. If you aim for computations that are non-linear in the number of pixels, there is a section which contains tips for you how you can use native code to speed your post-processor up.
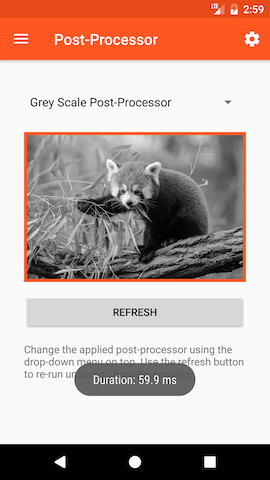
Example: Creating a Grey-Scale Filter
Let’s start with something simple: a post-processor that converts the bitmap into a grey-scale version. For this we need to iterate over the bitmap’s pixels and replace their color value.
The image is copied before it enters the post-processor. The original image in cache is not affected by any changes you make in your post-processor. On Android 4.x and lower, the copy is stored outside the Java heap, just as the original image was.
The BasePostprocessor expects our sub-class to override one of its BasePostprocessor#process method. The simplest one performs in-place modifications of the provided bitmap. Here, the image is copied before it enters the post-processor. Thus, the original of the image in cache is not affected by any changes you make in the post-processor. We will later discuss how we can also modify the configuration and size of the outputted bitmap.
1
2
3
4
5
6
7
8
9
10
11
12
13
14
15
16
17
18
19
20
21
22
23
24
25
26
27
28
29
30
31
32
33
34
public class FastGreyScalePostprocessor extends BasePostprocessor {

  @Override
  public void process(Bitmap bitmap) {
    final int w = bitmap.getWidth();
    final int h = bitmap.getHeight();
    final int[] pixels = new int[w * h];

    bitmap.getPixels(pixels, 0, w, 0, 0, w, h);

    for (int x = 0; x < w; x++) {
      for (int y = 0; y < h; y++) {
        final int offset = y * w + x;
        pixels[offset] = getGreyColor(pixels[offset]);
      }
    }

    // this is much faster then calling #getPixel and #setPixel as it crosses
    // the JNI barrier only once
    bitmap.setPixels(pixels, 0, w, 0, 0, w, h);
  }

  static int getGreyColor(int color) {
    final int alpha = color & 0xFF000000;
    final int r = (color >> 16) & 0xFF;
    final int g = (color >> 8) & 0xFF;
    final int b = color & 0xFF;

    // see: https://en.wikipedia.org/wiki/Relative_luminance
    final int luminance = (int) (0.2126 * r + 0.7152 * g + 0.0722 * b);

    return alpha | luminance << 16 | luminance << 8 | luminance;
  }
}
Caching Post-Processor Results
As we’ve seen that post-processing computations can be rather resource intensive, we want to cache the results. Cached output bitmaps are stored in the same cache as the decoded input bitmaps.
In order to use this feature, the post-processor must override the PostProcessor#getPostProcessorCacheKey method. It should return a cache key that is dependent on all important input values that effect the performed modifications.
For this example we extend an existing WatermarkPostprocessor that draws a watermark text multiple times on the image:
1
2
3
4
5
6
7
8
9
10
11
public class CachedWatermarkPostprocessor extends WatermarkPostprocessor {

  @Override
  public CacheKey getPostprocessorCacheKey() {
    return new SimpleCacheKey(String.format(
        (Locale) null,
        "text=%s,count=%d",
        mWatermarkText,
        mCount));
  }
}
In-place Bitmap transformation
As an alternative to post-processors, you can use a BitmapTransformation instead. Compared to normal post-processors, a BitmapTransformation will be applied to the original Bitmap immediately after it is decoded, which also means that the original image will not be cached and no additional Bitmap has to be allocated. In-place Bitmap transformations are the preferred way for images where you never need the original version. An example would be a BitmapTransformation for fully circular profile pictures:
1
2
3
4
5
6
7
8
9
10
11
12
public class CircularBitmapTransformation implements BitmapTransformation {

  @Override
  public void transform(Bitmap bitmap) {
    NativeRoundingFilter.toCircle(bitmap);
  }

  @Override
  public boolean modifiesTransparency() {
    return true; // We have transparent pixels
  }
}
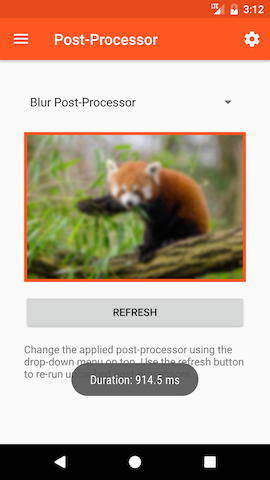
Advanced: JNI and Blurring
One of the most commonly asked for post-processing effects is blurring. Luckily, Fresco ships with a very efficient implementation in native C code accessible through NativeBlurFilter#iterativeBoxBlur.
When you are considering more advanced post-processing, using native code is a great way to improve performance. If you go down this path, have a look at the implementation in blur_filter.c on how to work with bitmaps in native code. Most importantly it explains you how to lock the pixels in memory and other important tricks.
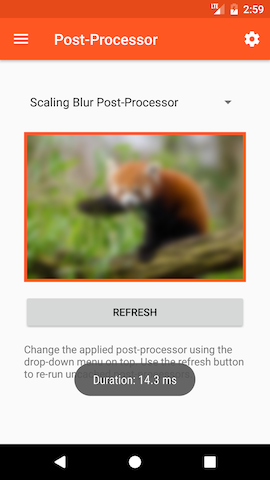
Advanced: Changing the Bitmap’s Size
Even with an efficient implementation in native code, the post-processor can take a long time. For more efficient blurring, we can down-scale the image, blur the small version and then let the GPU scale it up when displayed. As blurred images do not have hard edges, this optimization usually goes unrecognized.
In our new post-processor we override an overloaded variant of the BasePostProcessor#process() method. That variant provides a PlatformBitmapFactory that we can use to create a custom output bitmap. Note that we must no longer modify the sourceBitmap, as it is not a copy that has been created for us.
1
2
3
4
5
6
7
8
9
10
11
12
13
14
15
16
17
18
19
20
21
22
23
24
25
26
27
28
29
30
31
32
33
public class ScalingBlurPostprocessor extends FullResolutionBlurPostprocessor {

 /**
   * A scale ration of 4 means that we reduce the total number of pixels to process by factor 16.
   */
  private static final int SCALE_RATIO = 4;

  @Override
  public CloseableReference<Bitmap> process(
      Bitmap sourceBitmap,
      PlatformBitmapFactory bitmapFactory) {
    final CloseableReference<Bitmap> bitmapRef = bitmapFactory.createBitmap(
        sourceBitmap.getWidth() / SCALE_RATIO,
        sourceBitmap.getHeight() / SCALE_RATIO);

    try {
      final Bitmap destBitmap = bitmapRef.get();
      final Canvas canvas = new Canvas(destBitmap);

      canvas.drawBitmap(
          sourceBitmap,
          null,
          new Rect(0, 0, destBitmap.getWidth(), destBitmap.getHeight()),
          mPaint);

      NativeBlurFilter.iterativeBoxBlur(destBitmap, BLUR_RADIUS / SCALE_RATIO, BLUR_ITERATIONS);

      return CloseableReference.cloneOrNull(bitmapRef);
    } finally {
      CloseableReference.closeSafely(bitmapRef);
    }
  }
}
Limitations
Please keep the following rules in mind when creating post-processors
- If you show the same image repeatedly, you must specify the post-processor each time it is requested. You are free to use different post-processors on different requests for the same image.
- Post-processors are not currently supported for animated images.
- If you use transparency in your post-processor, call
destinationBitmap.setHasAlpha(true); - Do not override more than one of the three
processmethods. Doing so can produce unpredictable results. - Do not modify the source Bitmap when using a
processmethods that requires you to create a new destination bitmap. - Do not keep a reference to either bitmap. Both have their memory managed by the image pipeline. The destBitmap will end up in your Drawee or DataSource normally.
- Do not use the Android
Bitmap.createBitmapmethod for creating a new Bitmap. This would work against the central Bitmap pool in Fresco.
Full Sample
For the full sample see the ImagePipelinePostProcessorFragment in the showcase app: ImagePipelinePostProcessorFragment.java. It includes all post-processors from this page as well as additional ones.